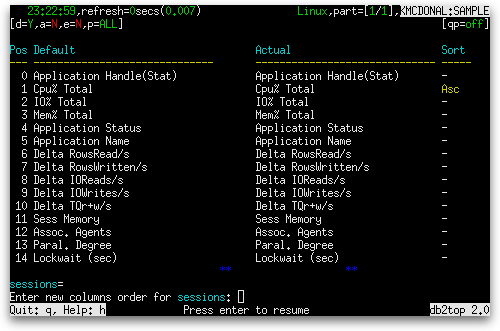
The db2top tool is all about showing the top sessions, bufferpools, tablespaces, etc. by some criteria. It wouldn’t be very useful if it didn’t let you choose these criteria. Fortunately, db2top lets you quickly base the order in which the data is presented on the criteria of your choice. In today’s post, we’ll see how.
Let’s start by examining a screen containing a table: the Sessions screen. By default, the Sessions screen is sorted by the Cpu% Total column in ascending order. You can confirm this by pressing ‘c’ to look at the Change Column Order screen. We see the letters “Asc” in the Sort column on this screen across from the words “Cpu% Total”, indicating that the Cpu% Total column is sorted in ascending order. Press the Enter key to return to the Sessions screen.

You can change the column used to sort the data by pressing the ‘z’ key (for descending sort) or holding the Shift key and pressing the ‘Z’ key (for ascending sort). When you press the ‘z’ key, a prompt appears under the header saying, “Column number for descending sort:”. As can be determined by looking at the Change Column Order screen, the Sessions screen has 40 columns, numbered starting at zero, so choose a number between zero and 39 and press Enter. The data will now be sorted in descending order on the column you chose.
If instead you hold the Shift key and press the ‘Z’ key, the behavior is identical except that the sorting is ascending instead of descending.
Shorter and longer default sorts
For certain db2top screens, there is a column labeled with a number in brackets after its name. For example, in the Sessions screen, the Recent Cpu column has, by default, a “[3]” at the end of its name. This number represents the number of samples that are summed together to produce the value shown in that column. These samples act as a sliding window. As time passes, new samples are picked up and old samples are discarded. You can control the size of this sliding window by using the plus ‘+’ and minus ‘-‘ keys to increase and decrease the window size, respectively. The window size can be as small as 1 sample and as large as 30 samples.

